Some time ago, Salesforce released Salesforce DX. With the Winter Release 2019 the DevHub became available for Developer Orgs. Together with the 2nd generation of packaging it is now possible to create unlocked and managed packages with Namespaces. In this article I quickly describe the steps to create a developer controlled (unlocked), namespaced package.
Step 1: Dev Hub
To enable a Salesforce DevHub, I had to sign up for a new Developer Edition. The DevHub runs only correctly if “my domain” is enabled and NO namespace is assigned to the DevHub Org.
Step 2: Namespace Org
For the registration of a Namespace (that is globally unique) a 2nd org must be setup. In the Menu (Setup -> Packages) I registered the Namespace “simpleforce”.

Step 3: Link Namespace to DevHub
Before linking a Namespace to the DevHub, my domain must be enabled. Without my domain the “Link Namespace” button is not visible.
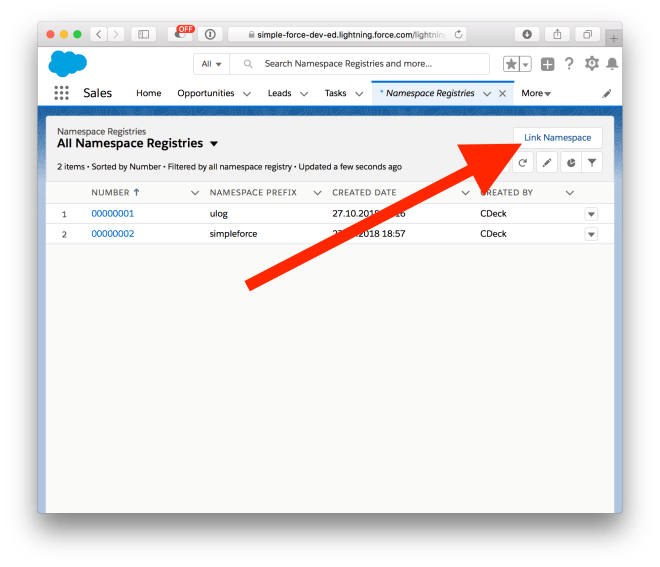
The Linking Process is done in 2 steps: (1) I had to enter username and password of the org that holds the namespace. After confirming that the DevHub has access to that org, the namespace is linked to the DevHub.
Step 3: Setup Project
To create a namespaced package, a new project must be setup. A project can contain multiple packages. In my case the project is called simple-force:
sfdx force:project:create --name simple-force
A single DevHub can link multiple Namespaces. But a project can be only linked to a single Namespace. The namespace must be specified in the Project Definitional fine:

From now on all packages creates in this project will be part of the selected Namespace.
Step 4: Create the Package
To separate components that belong to my new package “ulog” from other components, I created a new folder and registered a new package called “ulog”:
mkdir ulog

sfdx force:package:create --name ulog --packagetype unlocked --path ulog

The created package is empty. I created a new scratch org and deployed the universal logger in to the scratch org. Using the force:source:pull command all components of the scratch org are getting downloaded:
// create scratch org
sfdx force:org:create -f config/project-scratch-def.json -u devOrg

// pull content
sfdx force:source:pull -u devOrg
To choose which components are part of my package, I moved the relevant components from “force-app” to the “ulog” folder:

Components such as profiles that are not needed for the package are not moving to the new folder.
After all components are in the right package folder. A new version of the package had to be created.
sfdx force:package:version:create -p ulog -x -w 10
All components are getting uploaded to Salesforce. And the new package becomes available for other orgs to install.
Step 5: Install the Package
To check if the package can be installed in a new org, I created a new scratch org and installed the package:
sfdx force:org:create -f config/project-scratch-def.json -u valorg

sfdx force:package:install -p 04t1t000001yUV2AAM -u valorg -w 10
Finally the package is successfully installed and my first namespaced package created!

Thanks for useful information. Just a question, if you please: where the package is created at the end of step 4, in which org? Thanks.